- In Office 2010, Microsoft added a tool to take screenshots (entire screen capture) and screen clippings (portion of the screen) to insert them in Word, Excel, Outlook, and PowerPoint.

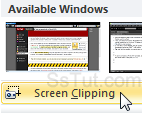
 Click on the Insert tab and the "Screenshot" button (keyboard shortcut = Alt+N, S, C). You'll see thumbnails of all programs currently running that aren't not minimized. To insert a picture of another program window, just click on it! Word resizes it as needed, and adds it to your document.
- To only copy a portion of the screen in another application, bring that application to the front, and go back to Word. Go to Insert > Screenshot, and select "Screen Clipping" at the bottom:

- Word automatically minimizes itself and brings the next background program to the front. When you see show a crosshair cursor on an opaque screen after two seconds, drag a rectangle around the area you want: it will be inserted into your document as soon as you release the mouse button. (If you want to take a screenshot of Word itself, quickly press Alt+Tab to "un-minimize" it.)
Tip: with OneNote installed, you can also take screen clippings by pressing Windows Key + S.

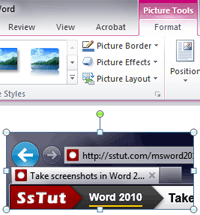
- The screenshot or screen clipping has been automatically added to your document: it is selected, and the Picture Tools tab is visible: it is an image like any other you paste or import in Word. If you didn't quite capture the area you wanted, use the Crop tool to adjust its boundaries.

- To insert screenshots in Word 2007 / 2003, take them yourself: hit the Print Screen key to copy the entire screen, or Alt+Print Screen for a picture of just current window. Then paste (Ctrl+V).
Email AOL Mail Gmail Hotmail Yahoo Mail MS Office Excel 2010 OneNote 2010 Outlook 2010 Word 2010 OS & Devices Kindle Fire Windows 7 Web Dev C# and .NET JavaScript jQuery