 Windows 7 supports "Open Type" font files (
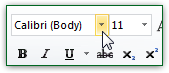
*.otf) and "True Type" fonts (*.ttf). A quick way to check if you already have a certain font on your computer is to look for it in the font dropdown of any text editor, like Notepad or Microsoft Word (pictured). Note that not all applications are able to display any font - some legacy files, like*.fon, are ignored by many newer programs.Tip: to view the fonts currently installed on your PC, type "fonts" in the start menu's search field and hit Enter. The "Fonts" screen will open in the Control Panel (in Vista or Windows XP, this would just open the operating system's
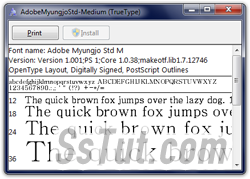
C:\Windows\Fontsfolder - same location as Windows 7).- There are two ways to add a font to Windows: the best way, especially for fonts downloaded from the internet, is to first preview it to ensure that it is a valid file and an uncorrupted download.
- Double-click on the font file to launch the Windows Font Viewer app, which displays version number and other specs, plus a preview of the selected font's entire alphabet followed by different text sizes of a now-famous sentence: "The quick brown fox jumps over the lazy dog. 1234567890".

 Click on the Install button to setup the font: depending on how you logged into Windows and your security settings, you may have to enter the administrator's password. If the Install button is disabled (grayed out), it means that this particular font or font variant is already installed!
 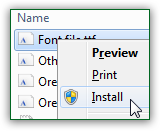 The second way to install a font is to right-click on the TTF / OTF file on your desktop or a folder in Windows Explorer, and choose "Install" from the context menu. If you already have this font, you'll get a "The {font name} is already installed. Do you want to replace it?" confirmation message - click Yes to proceed (if it's an updated version that you need), otherwise just click No and nothing will be installed:
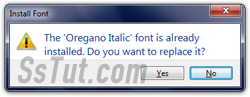
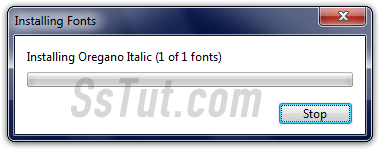
- Once the "Installing Font" (pictured below) automatically closes, the new font has successfully been installed. Restart any program in which you want to use that font, and you are done!
Tip: if your text appears too blurry or, the contrary, too jagged on the screen, you can adjust the amount of "anti aliasing" the operating system uses by changing your ClearType settings.
Email AOL Mail Gmail Hotmail Yahoo Mail MS Office Excel 2010 OneNote 2010 Outlook 2010 Word 2010 OS & Devices Kindle Fire Windows 7 Web Dev C# and .NET JavaScript jQuery