- You can add a highlighter effect to portions of your Microsoft Word documents with a single click.
Note: you need to follow different steps to change the entire page's background color.
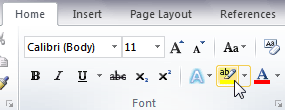
- Select the text to emphasize, and look at the ribbon's Home tab (visible by default).
- The yellow marker is the default color - click on it to highlight the current selection:


Tip - access this command with the following keyboard shortcut: Alt+H, i, Enter.
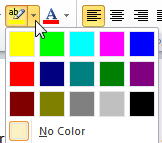
- Click on the dropdown arrow to change highlight color; with the keyboard, use the arrow keys to change color. (The end of this tutorial explains how to create your own color combinations.)

- To remove the highlighted background effect, choose "No Color" under the dropdown.
Tip - un-highlight the current text selection with this keyboard shortcut: Alt+H, i, N.
- You can even save your custom highlighter combinations:
- Select the highlighted text and right-click: go to "Styles > Save selection as a new quick style".
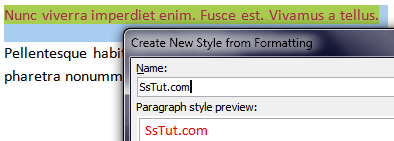
- Label it with a meaningful name, like "Red-On-Yellow Highlighting".

- Since Word ignores background colors when saving quick styles, click Modify to add it manually.
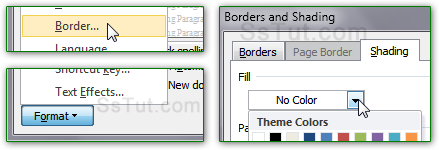
- Click on the Format button (bottom left corner), and choose "Border". Select the "Shading" tab, pick or make your own background (clicking "More colors" at the bottom), and click OK.

- The preview in the quick style builder now includes the background! Click OK to save it.
- Now re-use your custom highlight scheme with a click in the styles palette:

Tip: once you apply a custom highlight combination, you can't remove it the usual way. Select it, and click on the "Normal" style swatch (also available under the context menu).

Email AOL Mail Gmail Hotmail Yahoo Mail MS Office Excel 2010 OneNote 2010 Outlook 2010 Word 2010 OS & Devices Kindle Fire Windows 7 Web Dev C# and .NET JavaScript jQuery